创建虚拟机
前提条件
- 创建虚拟机时,宿主机至少需要保留12核32G内存以上的资源作为宿主机的开销,剩余资源均分给虚拟机。
- 创建虚拟机时,虚拟机的资源配置建议最大不超过180核992G内存。
- 请您自行准备操作系统ISO镜像文件。
不同的操作系统创建虚拟机的操作步骤不同,可直接参考表1直接跳转到对应的内容。
openEuler 22.03 LTS/openEuler 20.03 LTS/Kylin V10/Kylin V10 SP2/Kylin V10 SP3/BC Linux 21.10/UOS V20(1050e)/UOS V20(1050u2e)/CULinux 3.0/CentOS 7.5(5.10.0)/Tlinux3.1/Ubuntu 20.04/Ubuntu 22.04/veLinux 1.1/BC Linux 8.2/veLinux 1.1(5.10.200)

本章节以Atlas 800 推理服务器(型号:3010)+Atlas 300I Pro 推理卡 openEuler 22.03 LTS系统为例说明,操作步骤中的打印信息仅为示例,请以实际操作界面为准。
- 以root用户将ISO镜像上传至服务器任意目录(例如/opt)。
- 执行如下命令,检查selinux状态,确保selinux为关闭状态。
getenforce
[root@localhost qemu-4.1.0]# getenforce
Enforcing
若回显信息提示“command 'getenforce' not found”,请根界面据提示信息安装相关依赖。
若显示信息为Enforcing,需要通过如下方式关闭selinux。
- 执行如下命令,临时关闭selinux。
- 执行如下命令,永久关闭selinux。
修改如下加粗字体为disabled,保存后执行reboot命令重启物理机。
[root@localhost qemu-4.1.0]# vi /etc/selinux/config
# This file controls the state of SELinux on the system.
# SELINUX= can take one of these three values:
#     enforcing - SELinux security policy is enforced.
#     permissive - SELinux prints warnings instead of enforcing.
#     disabled - No SELinux policy is loaded.
SELINUX=disabled
# SELINUXTYPE= can take one of these three values:
#     targeted - Targeted processes are protected,
#     minimum - Modification of targeted policy. Only selected processes are protected.
#     mls - Multi Level Security protection.
SELINUXTYPE=targeted
- 设置display环境变量。
export DISPLAY=<客户端ip>:0.0
客户端ip是指个人电脑的ip,可通过个人电脑的cmd输入ipconfig或者在服务器上输入who查看。
- 执行如下命令,查询当前环境剩余内存大小。
free -h
             total        used        free      shared    buff/cache   available
Mem:         251Gi        1.5Gi       249Gi      19Mi       774Mi      248Gi
Swap:        108Gi          0B        108Gi
创建虚拟机时,虚拟机分配的内存ram_size请根据当前环境查询的内存大小进行配置。
- 执行如下命令,创建虚拟机。
virt-install --name=<NAME> --vcpus=<VCPUS> --ram=<ram_size> --disk <DISK> --machine <Machine> --cdrom <CDROM> --network <NETWORK> --force --graphic <GRAPHICS> --input <INPUT>
例如:
virt-install --name=openeuler --vcpus=4 --ram=8192 --disk path=/home/kvm/images/openeuler.img,format=qcow2,size=50,bus=virtio --machine pc-q35-4.1 --cdrom /home/kvm/openEuler-22.03-LTS-x86_64-dvd.iso --network bridge=virbr0,model=virtio --force --graphic vnc,listen=0.0.0.0,port=5906 --input type=tablet,bus=usb --input type=keyboard,bus=virtio
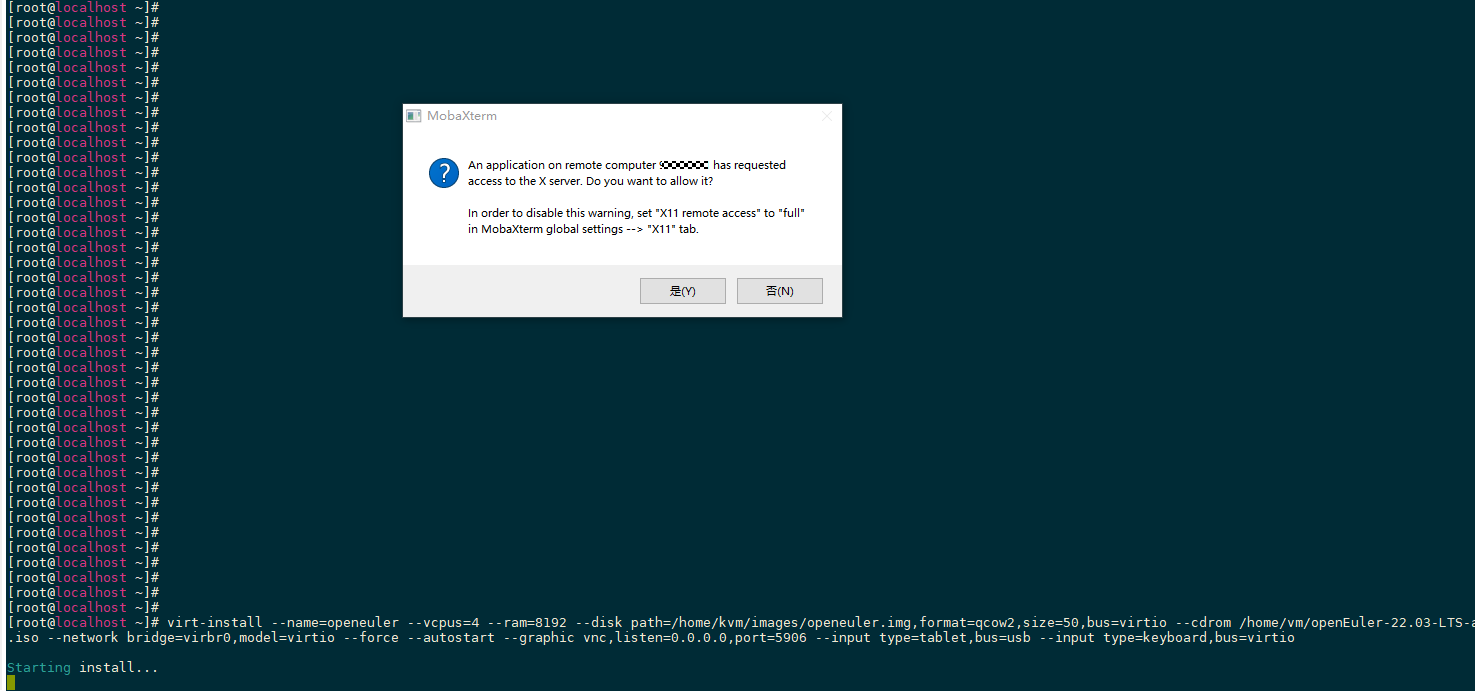
[root@localhost qemu-4.1.0]# virt-install --name=openeuler --vcpus=4 --ram=8192 --disk path=/home/kvm/images/openeuler.img,format=qcow2,size=50,bus=virtio --machine pc-q35-4.1 --cdrom /home/kvm/openEuler-22.03-LTS-x86_64-dvd.iso --network bridge=virbr0,model=virtio --force --graphic vnc,listen=0.0.0.0,port=5906 --input type=tablet,bus=usb --input type=keyboard,bus=virtio
WARNING  No operating system detected, VM performance may suffer. Specify an OS with --os-variant for optimal results.

Starting install...
对于Atlas 200T A2 Box16 异构子框 veLinux 1.1/veLinux 1.1(5.10.200)系统时,请执行如下命令创建虚拟机。
virt-install --name=<NAME> --vcpus=<VCPUS> --ram=<ram_size> --disk <DISK> --machine <Machine> --cdrom <CDROM> --network <NETWORK> --force --graphic <GRAPHICS> --input <INPUT> --cpu <CPU>
例如:
virt-install --name=debian --vcpus=160 --ram=65536 --disk path=/home/kvm/images/debian.img,format=qcow2,size=50,bus=virtio --machine pc-q35-4.1 --cdrom /home/kvm/velinux-1.1-business-amd64-DVD-1.iso --network bridge=br0,model=virtio --force --graphic vnc,listen=0.0.0.0,port=5901 --input type=tablet,bus=usb --input type=keyboard,bus=virtio --cpu host-passthrough
virt-install --name=debian --vcpus=160 --ram=65536 --disk path=/home/kvm/images/debian.img,format=qcow2,size=50,bus=virtio --machine pc-q35-4.1  --cdrom /home/kvm/velinux-1.1-business-amd64-DVD-1.iso --network bridge=br0,model=virtio --force --graphic vnc,listen=0.0.0.0,port=5902 --input type=tablet,bus=usb --input type=keyboard,bus=virtio --cpu host-passthrough
WARNING  No operating system detected, VM performance may suffer. Specify an OS with --os-variant for optimal results.
Starting install...
Domain creation completed.
Restarting guest.
表2 参数说明 参数
说明
NAME
指定新虚拟机的名称。
说明:该名称必须保持唯一。
VCPUS
指定虚拟CPU数量。
ram_size
客户端虚拟机分配的内存,单位MB。
DISK
指定存储设备及其属性。
Machine
创建虚拟机时配置的机器类型。
- aarch64架构:指定的机器类型需为virt-4.1及以上版本。
- x86架构:指定的机器类型需为pc-q35-4.1及以上版本。
可通过执行如下命令查询当前环境支持的机器类型。
qemu-system-<ARCH> -machine help
CDROM
对应全虚拟化客户机,文件或设备作为一个虚拟化CD-ROM设备使用。
可以是ISO映像路径或者一个CDROM设备,或是一个能够提取/访问最小引导ISO映像的URL。
NETWORK
网络配置:指定网络接口的网络类型及接口属性如MAC地址、驱动模式等。
- bridge=BRIDGE:连接至名为“BRIDGE”的桥设备。
- model:虚拟机中看到的网络设备型号。
--force
禁止命令进入交互式模式,如果有需要回答yes或no选项,则自动回答为yes。
--autostart
(可选)指定虚拟机是否在物理启动后自动启动。
GRAPHICS
定义虚拟机显示功能相关的配置,如VNC相关配置
- -graphics TYPE,opt1=val1,opt2=val2:指定图形显示相关的配置,此选项不会配置任何硬件(如显卡),而是仅指定虚拟机启动后对其访问的接口。
- TYPE:指定显示类型,如vnc, sdl, spice或none等,默认为vnc。
- port:TPYE为VNC或spice时其监测的端口。
- listen:TPYE为VNC或spice时所监测的IP地址,默认为127.0.0.1,可以通过修改/etc/libvirt/qemu.conf定义新的默认值。
INPUT
配置虚拟机输入设备。例如:
- --input tablet
- --input keyboard,bus=usb,bus=virtio
CPU
指定CPU模式。例如:
- --cpu host-passthrough
- --cpu host-model-only
建议根据使用场景选择配置模式。
- 在要求访问X server的弹窗中选择“是”(可能需要多次确认)。
Debian 11.8/Debian10.13/veLinux 1.2/Debian10.8
- 以root用户将ISO镜像上传至物理机任意目录(例如/home/test)。
- 在物理机任意目录上(例如/home/test)创建Debian_11_normal.xml文件,将如下内容拷贝至文件。
Debian_11_normal.xml名称用户自定义,此处仅为举例。
<domain type='kvm'>
  <name>Debian</name>
  <memory unit='GiB'>64</memory>
  <currentMemory unit='GiB'>64</currentMemory>
  <vcpu placement='static'>8</vcpu>
  <resource>
    <partition>/machine</partition>
  </resource>
  <os>
    <type arch='aarch64' machine='virt'>hvm</type>
    <loader readonly='yes' type='pflash'>/home/test/qemu_4_1/usr/share/edk2/aarch64/QEMU_EFI-pflash.raw</loader>
    <nvram>/home/test/qemu_4_1/usr/share/edk2/aarch64/vars-template-pflash.raw</nvram>
    <boot dev='hd'/>
    <boot dev='cdrom'/>
  </os>
  <features>
    <acpi />
    <gic version='3'/>
  </features>
  <cpu mode='host-passthrough' check='none'/>
  <clock offset='utc'>
    <timer name='rtc' tickpolicy='catchup' track='guest'/>
    <timer name='hpet' present='no'/>
    <timer name='pit' tickpolicy='delay'/>
  </clock>
  <on_poweroff>destroy</on_poweroff>
  <on_reboot>restart</on_reboot>
  <on_crash>restart</on_crash>
  <devices>
    <!--emulator>/usr/local/bin/qemu-system-aarch64</emulator-->
    <emulator>/home/test/qemu-4.1.0/aarch64-softmmu/qemu-system-aarch64</emulator>
    <disk type='file' device='disk'>
      <driver name='qemu' type='raw' cache='none' io='threads'/>
      <source file='/home/test/debian.raw'/>
      <target dev='sda' bus='virtio'/>
    </disk>
    <disk type='file' device='cdrom'>
      <driver name='qemu' type='raw' cache='none'/>
      <source file='/home/kvm/debian-11.8.0-arm64-DVD-1.iso'/>
      <target dev='sdb' bus='sata'/>
      <readonly/>
    </disk>
    <controller type='usb' index='0' model='ehci'>
      <address type='pci' domain='0x0000' bus='0x03' slot='0x01' function='0x0'/>
    </controller>
    <controller type='pci' index='0' model='pcie-root'/>
    <controller type='pci' index='1' model='pcie-root-port'>
      <model name='pcie-root-port'/>
      <target chassis='1' port='0x8'/>
      <address type='pci' domain='0x0000' bus='0x00' slot='0x01' function='0x0' multifunction='on'/>
    </controller>
    <controller type='pci' index='2' model='pcie-root-port'>
      <model name='pcie-root-port'/>
      <target chassis='2' port='0x9'/>
      <address type='pci' domain='0x0000' bus='0x00' slot='0x01' function='0x1'/>
    </controller>
    <controller type='pci' index='3' model='pcie-to-pci-bridge'>
      <model name='pcie-pci-bridge'/>
      <address type='pci' domain='0x0000' bus='0x01' slot='0x00' function='0x0'/>
    </controller>
    <controller type='pci' index='4' model='pcie-root-port'>
      <model name='pcie-root-port'/>
      <target chassis='4' port='0xa'/>
      <address type='pci' domain='0x0000' bus='0x00' slot='0x01' function='0x2'/>
    </controller>
    <controller type='pci' index='5' model='pcie-root-port'>
      <model name='pcie-root-port'/>
      <target chassis='5' port='0xb'/>
      <address type='pci' domain='0x0000' bus='0x00' slot='0x01' function='0x3'/>
    </controller>
    <controller type='pci' index='6' model='pcie-root-port'>
      <model name='pcie-root-port'/>
      <target chassis='6' port='0xc'/>
      <address type='pci' domain='0x0000' bus='0x00' slot='0x01' function='0x4'/>
    </controller>
    <controller type='pci' index='7' model='pcie-root-port'>
      <model name='pcie-root-port'/>
      <target chassis='7' port='0xd'/>
      <address type='pci' domain='0x0000' bus='0x00' slot='0x01' function='0x5'/>
    </controller>
    <controller type='pci' index='8' model='pcie-root-port'>
      <model name='pcie-root-port'/>
      <target chassis='8' port='0xe'/>
      <address type='pci' domain='0x0000' bus='0x00' slot='0x01' function='0x6'/>
    </controller>
    <controller type='pci' index='9' model='pcie-root-port'>
      <model name='pcie-root-port'/>
      <target chassis='9' port='0xf'/>
      <address type='pci' domain='0x0000' bus='0x00' slot='0x01' function='0x7'/>
    </controller>
    <controller type='virtio-serial' index='0'>
      <address type='pci' domain='0x0000' bus='0x03' slot='0x02' function='0x0'/>
    </controller>
    <interface type='bridge'>
      <mac address='52:54:00:5b:38:51'/>
      <source bridge='virbr0'/>
      <model type='virtio'/>
      <driver name='vhost'/>
      <address type='pci' domain='0x0000' bus='0x02' slot='0x00' function='0x0'/>
    </interface>
    <serial type='pty'>
      <target type='system-serial' port='0'>
        <model name='pl011'/>
      </target>
    </serial>
    <console type='pty'>
      <target type='serial' port='0'/>
    </console>
    <input type='keyboard' bus='usb'>
      <address type='usb' bus='0' port='2'/>
    </input>
    <graphics type='vnc' port='-1' autoport='yes' listen='0.0.0.0'>
      <listen type='address' address='0.0.0.0'/>
    </graphics>
    <serial type='file'>
    <source path='/home/serial-file' append='on'/>
    </serial>
    <video>
      <model type='virtio' heads='1' primary='yes'/>
      <address type='pci' domain='0x0000' bus='0x03' slot='0x04' function='0x0'/>
    </video>
  </devices>
  <seclabel type='none' model='none'/>
  <seclabel type='dynamic' model='dac' relabel='yes'/>
</domain>
根据实际情况进行定制化修改。
- 修改虚拟机名称和内存配置大小,如下加粗字体标注的内容。
<name>Debian</name>
  <memory unit='GiB'>64</memory>
  <currentMemory unit='GiB'>64</currentMemory>
- 修改OS参数中的pflash路径和nvram路径,如下加粗字体标注的内容,根据编译、安装后的EDK2工具所在目录进行修改。
<os> <type arch='aarch64' machine='virt'>hvm</type> <loader readonly='yes' type='pflash'>/home/test/qemu_4_1/usr/share/edk2/aarch64/QEMU_EFI-pflash.raw</loader> <nvram>/home/test/qemu_4_1/usr/share/edk2/aarch64/vars-template-pflash.raw</nvram> <boot dev='hd'/> <boot dev='cdrom'/> </os> - 修改disk的source file所在目录,如下加粗字体标注的内容,根据Debian系统创建的虚拟机磁盘空间名称以及磁盘空间所在目录进行修改。
<disk type='file' device='disk'> <driver name='qemu' type='raw' cache='none' io='threads'/> <source file='/home/test/debian.raw'/> <target dev='sda' bus='virtio'/> </disk> - 修改disk的source file所在目录,如下加粗字体标注的内容,根据Debian系统的ISO镜像文件所在目录进行修改。
<disk type='file' device='cdrom'> <driver name='qemu' type='raw' cache='none'/> <source file='/home/test/debian-11.8.0-arm64-DVD-1.iso'/> <target dev='sdb' bus='sata'/> <readonly/> </disk> - 修改bridge的source bridge名称,如下加粗字体标注的内容,根据配置网桥时创建的虚拟网卡名称进行修改。
<interface type='bridge'> <mac address='52:54:00:5b:38:51'/> <source bridge='virbr0'/> <model type='virtio'/> <driver name='vhost'/> <address type='pci' domain='0x0000' bus='0x02' slot='0x00' function='0x0'/> </interface> - 修改devices的qemu-system-aarch64路径,如下加粗字体标注的内容,可通过执行find / -name qemu-system-aarch64命令获取qemu-system-aarch64具体路径进行修改。
  <devices>
    <!--emulator>/usr/local/bin/qemu-system-aarch64</emulator-->
    <emulator>/home/test/qemu-4.1.0/aarch64-softmmu/qemu-system-aarch64</emulator>
    <disk type='file' device='disk'>
      <driver name='qemu' type='raw' cache='none' io='threads'/>
      <source file='/home/test/debian.raw'/>
      <target dev='sda' bus='virtio'/>
- 修改虚拟机名称和内存配置大小,如下加粗字体标注的内容。
- 修改后保存.xml文件,其他参数可以根据用户需求自行修改。
- 执行如下命令,创建虚拟机。
virsh create Debian_11_normal.xml
Debian_11_normal.xml请根据用户实际命名的.xml文件名称进行替换,此处仅为举例。
- 执行如下命令,安装虚拟机。
virt-viewer
- (可选)在要求访问X server的弹窗中选择“是”(可能需要多次确认)。
