图像分类应用样例开发介绍(Python)
样例介绍
本文以MindX SDK来开发一个简单的图像分类应用,图像分类模型推理流程如图1 分类模型推理流程图所示。

本例中使用的是Caffe框架的ResNet-50模型。可以直接使用训练好的开源模型,也可以基于开源模型的源码进行修改、重新训练,还可以基于算法、框架构建适合的模型。
模型的输入数据与输出数据格式:
- 输入数据:RGB格式、224*224分辨率的输入图片。
- 输出数据:图片的类别标签及其对应置信度。
获取代码
- 获取代码文件。
单击获取链接或使用wget命令,下载代码文件压缩包,以root用户登录开发者套件。
wget https://ascend-repo.obs.cn-east-2.myhuaweicloud.com/Atlas%20200I%20DK%20A2/DevKit/models/sdk_cal_samples/resnet50_sdk_python_sample.zip
- 将“resnet50_sdk_python_sample.zip”压缩包上传到开发者套件,解压并进入解压后的目录。
unzip resnet50_sdk_python_sample.zip
cd resnet50_sdk_python_sample
代码目录结构如下所示,按照正常开发流程,需要将框架模型文件转换成昇腾AI处理器支持推理的om格式模型文件,鉴于当前是入门内容,用户可直接获取已转换好的om模型进行推理。resnet50_sdk_python_sample ├── data │ ├── test.jpg # 测试图片 ├── model │ ├── resnet50.om # ResNet-50网络的om模型 ├── utils │ ├── resnet50.cfg # 用于后处理的配置文件,包含类别数量和是否包含softmax操作,具体可打开文件查看 │ ├── resnet50_clsidx_to_labels.names # 类别标签文件 ├── main.py # 运行程序的脚本
- 准备用于推理的图片数据。
如2所示文件结构,内置测试图片为“test.jpg”,用户也可从imagenet数据集中获取其它图片。
代码解析
开发代码过程中,在“resnet50_sdk_python_sample/main.py”文件中已包含读入数据、前处理、推理、后处理等功能,串联整个应用代码逻辑,此处仅对代码进行解析。
- 在“main.py”文件的开头有如下代码,用于导入需要的第三方库以及MindX SDK推理所需文件。
import numpy as np  # 用于对多维数组进行计算
import cv2  # 图片处理三方库,用于对图片进行前后处理

from mindx.sdk import Tensor  # mxVision 中的 Tensor 数据结构
from mindx.sdk import base  # mxVision 推理接口
from mindx.sdk.base import post  # post.Resnet50PostProcess 为 resnet50 后处理接口
- 初始化资源和模型相关变量,如图片路径、模型路径、配置文件路径、标签路径等。
'''初始化资源和变量'''
base.mx_init()  # 初始化 mxVision 资源
pic_path = 'data/test.jpg'  # 单张图片
model_path = "model/resnet50.om"  # 模型路径
device_id = 0  # 指定运算的Device
config_path='utils/resnet50.cfg'  # 后处理配置文件
label_path='utils/resnet50_clsidx_to_labels.names'  # 类别标签文件
img_size = 256
- 对输入数据进行前处理。先使用opencv读入图片,得到三维数组,再进行相应的图片裁剪、缩放、转换颜色空间等处理,并将其转化为MindX SDK推理所需要的数据格式(Tensor类型)。
'''前处理''' img_bgr = cv2.imread(pic_path) img_rgb = img_bgr[:,:,::-1] img = cv2.resize(img_rgb, (img_size, img_size)) # 缩放到目标大小 hw_off = (img_size - 224) // 2 # 对图片进行切分,取中间区域 crop_img = img[hw_off:img_size - hw_off, hw_off:img_size - hw_off, :] img = crop_img.astype("float32") # 转为 float32 数据类型 img[:, :, 0] -= 104 # 常数 104,117,123 用于将图像转换到Caffe模型需要的颜色空间 img[:, :, 1] -= 117 img[:, :, 2] -= 123 img = np.expand_dims(img, axis=0) # 扩展第一维度,适应模型输入 img = img.transpose([0, 3, 1, 2]) # 将 (batch,height,width,channels) 转为 (batch,channels,height,width) img = np.ascontiguousarray(img) # 将内存连续排列 img = Tensor(img) # 将numpy转为转为Tensor类 - 使用MindX SDK接口进行模型推理,得到模型输出结果。
'''模型推理'''
model = base.model(modelPath=model_path, deviceId=device_id)  # 初始化 base.model 类
output = model.infer([img])[0]  # 执行推理。输入数据类型:List[base.Tensor], 返回模型推理输出的 List[base.Tensor]
- 对模型输出进行后处理。利用MindX SDK所带的后处理插件,可直接得到预测类别及其置信度,并将其画在原图上。
'''后处理'''
postprocessor = post.Resnet50PostProcess(config_path=config_path, label_path=label_path)  # 获取后处理对象
pred = postprocessor.process([output])[0][0]  # 利用SDK接口进行后处理,pred:<ClassInfo classId=... confidence=... className=...>
confidence = pred.confidence  # 获取类别置信度
className = pred.className  # 获取类别名称
print('{}: {}'.format(className, confidence))  # 打印出结果

'''保存推理图片'''
img_res = cv2.putText(img_bgr, f'{className}: {confidence:.2f}', (20, 20), cv2.FONT_HERSHEY_SIMPLEX, 1, (255, 255, 255), 1)  # 将预测的类别与置信度添加到图片
cv2.imwrite('result.png', img_res)
print('save infer result success')
运行推理
- 配置环境变量。
source /usr/local/Ascend/mxVision/set_env.sh
- 运行主程序。
python main.py
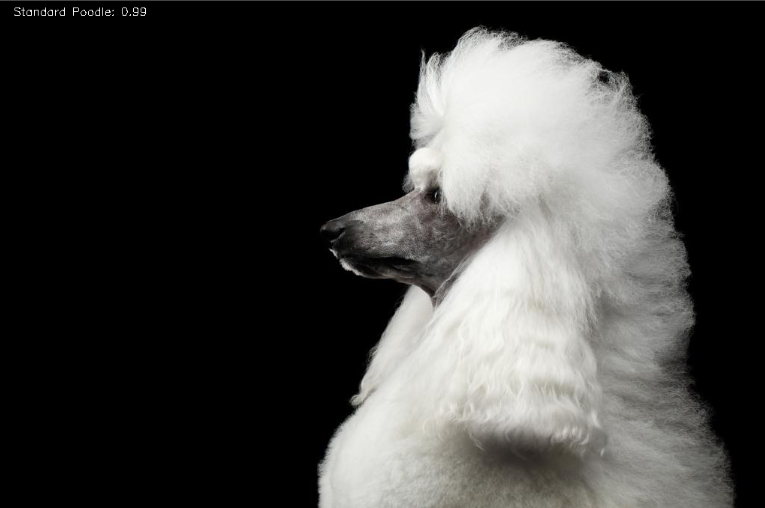
命令行输出如下,表明运行成功。Standard Poodle: 0.98583984375 save infer result success
推理完成后,在当前文件夹下生成“result.png”文件,如图2所示:
样例总结与扩展
以上代码包括以下几个步骤:
1. 前处理:对图片进行 缩放、裁剪、转换颜色空间、转换维度、连续排列内存、转为base.Tensor操作。
2. 推理:利用Model或者base.model初始化模型,并用infer进行推理。
3. 后处理:利用MindX SDK的后处理接口直接得到预测结果,提取结果后,将其打印到终端,顺便保存到图片。
MindX SDK接口分类总结:
分类 |
接口函数 |
描述 |
|---|---|---|
推理相关 |
base.model(model_path, device_id) |
初始化模型 |
model.infer([img]) |
通过输入Tensor列表进行模型推理 |
|
后处理相关 |
post.Resnet50PostProcess(config_path, label_path) |
ResNet-50后处理 |
理解各个接口含义后,用户可进行灵活运用。除此外,此样例中只示范了图片推理,若需要对视频流数据进行推理,可用两种方式输入视频流数据:USB摄像头、手机摄像头。具体使用方式可参考《摄像头拉流》,用户只需将前处理、推理及后处理代码放入摄像头推理代码的循环中即可,注意修改的逻辑如下:
- 引入三方库部分,加入import cv2。在初始化变量后,加入了USB摄像头读写相关代码,并在将图片前处理、推理、后处理相关代码放入了try...except...结构中。除此外,还相应的修改了数据前处理和后处理代码。
- 对于前处理,原来代码是利用opencv从路径中读入图片数据,而此处是直接从摄像头中获取图像帧,两者获取的数据都为bgr格式,所以前处理步骤相同。
- 对于后处理,代码也保持不变。
下面以USB摄像头为例,运行代码后,可在主目录保存结果视频“video_result.mp4”。其他摄像头使用方式可按相应逻辑修改:
import numpy as np  # 用于对多维数组进行计算
import cv2

from mindx.sdk import Tensor  # mxVision 中的 Tensor 数据结构
from mindx.sdk import base  # mxVision 推理接口
from mindx.sdk.base import post  # post.Resnet50PostProcess 为 resnet50 后处理接口


'''初始化变量'''
base.mx_init()  # 初始化 mxVision 资源
pic_path = 'data/test.jpg'  # 单张图片
model_path = "model/resnet50.om"  # 模型路径
device_id = 0  # 指定运算的Device
config_path='utils/resnet50.cfg'  # 后处理配置文件
label_path='utils/resnet50_clsidx_to_labels.names'  # 类别标签文件


# 打开摄像头
cap = cv2.VideoCapture(0)  # 打开摄像头

# 获取保存视频相关变量
fps = cap.get(cv2.CAP_PROP_FPS)
fourcc = cv2.VideoWriter_fourcc(*'mp4v')
outfile = 'video_result.mp4'
video_width = int(cap.get(cv2.CAP_PROP_FRAME_WIDTH))
video_height = int(cap.get(cv2.CAP_PROP_FRAME_HEIGHT))
writer = cv2.VideoWriter(outfile, fourcc, fps, (video_width, video_height))

try:
    while(cap.isOpened()):  # 在摄像头打开的情况下循环执行
        ret, frame = cap.read()  # 此处 frame 为 bgr 格式图片

        '''前处理'''
        img_size = 256
        img_rgb = frame[:,:,::-1]  # bgr to rgb
        img = cv2.resize(img_rgb, (img_size, img_size))  # 缩放到目标大小
        hw_off = (img_size - 224) // 2  # 对图片进行切分,取中间区域
        crop_img = img[hw_off:img_size - hw_off, hw_off:img_size - hw_off, :]
        img = crop_img.astype("float32")  # 转为 float32 数据类型
        img[:, :, 0] -= 104  # 常数 104,117,123 用于将图像转换到Caffe模型需要的颜色空间
        img[:, :, 1] -= 117
        img[:, :, 2] -= 123
        img = np.expand_dims(img, axis=0)  # 扩展第一维度,适应模型输入
        img = img.transpose([0, 3, 1, 2])  # 将 (batch,height,width,channels) 转为 (batch,channels,height,width)
        img = np.ascontiguousarray(img)  # 将内存连续排列
        img = Tensor(img) # 将numpy转为转为Tensor类

        '''模型推理'''
        model = base.model(modelPath=model_path, deviceId=device_id)  # 初始化 base.model 类
        output = model.infer([img])[0]  # 执行推理。输入数据类型:List[base.Tensor], 返回模型推理输出的 List[base.Tensor]

        '''后处理'''
        postprocessor = post.Resnet50PostProcess(config_path=config_path, label_path=label_path)  # 获取后处理对象
        pred = postprocessor.process([output])[0][0]  # 利用sdk接口进行后处理,pred:<ClassInfo classId=267 confidence=0.935546875 className=Standard Poodle>
        confidence = pred.confidence  # 获取类别置信度
        className = pred.className  # 获取类别名称

        '''保存推理帧到结果视频'''
        print('{}: {}'.format(className, confidence))  # 打印出结果
        img_res = cv2.putText(frame, f'{className}: {confidence:.2f}', (20, 20), cv2.FONT_HERSHEY_SIMPLEX, 0.5, (255, 255, 255), 1)
        writer.write(img_res)  # 将推理结果写入视频

except KeyboardInterrupt:
    cap.release()
    writer.release()
    print('save infer result success')
finally:
    cap.release()
    writer.release()
    print('save infer result success')